The other day I bought a 5v USB relay from eBay for a project I’m working on. The ultimate goal is to use it on a Raspberry Pi in a build where the GPIO pins are already being used by a touch screen. For just shy of $5 AUD with free shipping, it was a good buy I reckon.

The eBay listing says it comes with a Windows DLL for controlling it, but it never did (just the device in one of those silvery electrostatic bags and no download links in the listing). Plus the listing seemed to suggest the DLL was closed source and who needs that kind of negativity in their life? So I looked around to see if anyone else had worked with this.

Turns out they’re a fairly common device manufactured by “www.dcttech.com” and several people have written libraries that control these. The relay is basically a HID device. You send a feature report along with the relay you wish to activate and the state, plus some padding bytes, and you can control it without some unknown DLL file.

And turns out there’s an excellent cross-platform node.js library called node-hid. Give it the path or VID / PID of your device and you can read, write, set feature reports, get feature reports, and so on. Brilliant!

But no matter what I tried, I couldn’t get the damn thing to operate. In the end I “brute forced” it by writing a for loop that incremented some of the bytes until the relay clicked on. Slowing it down with a setInterval told me what bytes to send to turn them on and off. To turn it on, send 0xFE (254) to Report 0. To turn it off, send 0xFC (252) to Report 0. The 8th byte of report 0 when you request the feature report is 0 for off, and 3 for on. In other words, zero = off, nonzero = on

So here’s a short demo node.js app that will find the first USBRelay device and toggle it every second.

Note that this has only been tested on the one-relay board. However byte 3 when sending should be the relay number you wish to control

I’ve just installed GitLab on a server at work, in an attempt to unify all our separate projects that are stored in various locations. I’ve been a big fan of Git (or rather, GitHub) since I created my first project about 4 years ago. Now everything I do, including various parts of my Aurora Hunting Website, is maintained via Git. Deploying new code to servers is dead simple when you throw git into the fray.

I work in a department that is a mix of programmers, technical-but-not-programmers and definitely-non-technical people. This makes it a bit tricky to explain git in a way that non-technical people can understand. So I’m going to offer an EXTREMELY basic and naive view of what git is. Most things here are going to be anger-inducingly wrong, but this is for someone who has almost zero technical experience.

I’m impatient! Give me the too long; didn’t read version!

Git is a system that tracks who changes files, when they were changed and what changed in them. Changes are sent to a git server that keeps a record. People can make copies of those files, make changes, and send those changes back to be included in the record. It’s mostly used to keep track of who changed code and to allow better collaboration

So what is git?

Imagine you’re walking down the road and decide to keep track of all the neat things you find along the way. This is git. Git watches a folder or a series of folders and takes notice of what files have changed.

When you’ve seen a few cool things (or made a few changes to files), you might want to write them down. This is where a git server comes in.

How do I keep track of the stuff I’ve seen?

You’ll need a place to log the cool stuff you’ve seen so far, so you buy a notebook and write everything in it. It’s a permanent log of what you saw and when.

This is what a git server is. when you’ve lined up enough changes to files, you can push those details to the server for permanent storage. Git servers keep a record of who changed what file and when, plus what was changed in it, and offer a centralised place to store those changes

What if I go for a walk elsewhere?

Sure you could use the same book again, but it’d make sense to have more than one book. Maybe one for walks through the forest, and maybe one for walks through the city? In the git world, this is a repository, and you’d create a new one for each project you were working on.

Makes sense. So why would I want to use git?

Say you’ve got three people working on a single project. What happens if someone changes a file and everything falls into a crashing heap? Who did it? When? What did they change to break it all? Because the git server keeps a record of all this, you can see what was changed by who and when.

Git isn’t just for code either. It can keep track of things like photos and documents, though it won’t be able to show you what changed (because photos and documents with complex formatting and such aren’t easy to compare like text is)

So multiple people can change files?

Yes! Once those files are on the git server, people with the right permissions can come in and make a copy of those files. There’s a few ways to make a copy:

Cloning

Imagine you’ve invited a friend to join you on your walk. Each person is looking out for cool stuff, but you share the same notebook. When you clone, you make a copy of the files, but each change you send back is recorded under that repository

Branching

When you make a new branch, you give your friend a new section in your notebook, and they take notes on their own page when they walk. At any point in time, you can stop and copy what they have, into the main part of your book. When you branch, you’re still operating from the same repository. You’d typically use branches to test new things and fix issues, then when you’re done testing and fixing, you can pull the changes from that branch, back into the main (master) branch.

Forking

This is where git gets good. You’re walking down the road, and your friend decides to walk on a different path. You go one way, your friend goes the other. You make an exact copy of your book, and give it to them. Along the way you see some cool things, and you write them down in your separate books.

When you fork on a git server, you’re creating a separate repository. It contains all the changes made up until the point you forked it, but any new changes made go into that forked repository (meaning any changes made to the original repository are NOT added to your change list, and any changes you make are not added to the original change list).

What happens if my friend wants to rejoin me?

Your friend is done walking down their path, so they skip across the field and rejoin you. They want to share with you all the cool stuff they’ve seen so you can write it in your (master) book. In git terms, this is a “pull request”, because the forker or the brancher wants the original repository to pull in the changes they’ve made. The owner of the original repository can say yes, no or ask that changes be made before it’s accepted.

After a pull request is done, the fork can be deleted, or used to make more changes and do another pull request in the future.

Pull requests can be done between branches too, so in order to get your friend’s section of the book merged into the main section, they need to ask you to do it, because it’s your book.

Note that a pull request is one-way. So when your friend gives you all their new information, they don’t automatically get your new information. They would need to explicitly request that. This means that if your goals and their goals change (e.g. they want to focus on cars instead of birds, while you want to focus on birds only), they can give you information without fear of getting a ton of info about birds that they don’t want.

And what about conflicts?

So you’ve met back up and compared notes, but there’s a problem. You both saw the same bird, but your descriptions of it vary. They say the bird was white with blue spots, but you say the bird was black with no spots. Who is right? There needs to be a compromise.

Similar things happen on the git server. If you make a change to file A, and someone makes a change to file A in their fork or branch and tries to merge, which version is correct?

When there is a conflict, git changes the file to include BOTH of the changes. The owner of the original repository needs to go through and resolve the conflict by changing the file so only one of the two changes is in there. Once all conflicts have been resolved, the merge can go ahead.

In the case of our bird, you might put your foot down and say “no, the bird was definitely black”, but you might agree that you made a mistake, and that it had blue spots, and so you amend your notes. Now that that’s resolved, you can copy their info into your book.

Ignoring important stuff

While you’re out walking, you might not want to log everything you see. Maybe you’re only interested in birds. Or maybe you want to log all animals, except those sitting in a person’s yard. In git, you’d create a special file that tells it what to ignore. So if you have a file with passwords in it, you can tell git to ignore that file. Or entire folders, or a mix of both.

Final Thoughts

Hopefully this has been useful for you. If you need to explain git to a non-technical person, this can help. If I’ve missed something, feel free to leave a comment!

My app, auroras.live, has been out in the app stores for about two months now. There’s two versions available, a free and a paid version. Previously I was maintaining three GitHub branches — Master, Free and Paid. I’d make the changes in master, then make a PR to sync free and paid, then edit the config.xml in the respective repos so the app would detect and use the appropriate version.

After a while, this got tedious because I’d have to ensure all three branches were in sync, except for the config.xml file (which got reformatted each time a plugin was added), so I gave up on the idea. Gulp seemed like a great fit for all of this, so I whipped up a quick gulpfile that does a few things for me:

  • Sets the app name (e.g. Auroras.live Free or Auroras.live)
  • Sets the app ID (e.g. live.auroras.app.free or live.auroras.app)
  • Copies the correct icon file, then runs ionic resources to generate the proper icons
  • Builds the production version of the app
  • Signs the JAR, then runs zipalign.

All I need to do is call gulp build-android-free or gulp build-android-paid and it’s all done. No more manually editing config files, no more copying files around. It’s easy! Want this for your own app? The code is below:

All you need to do is:

  • Run npm install --save xmldoc in addition to the other dependencies for Ionic’s default gulpfile
  • Edit gulpfile.js and replace the defaults at the top of the file with your own.
  • Go into your resources folder and make two icons: icon_free.png and icon_paid.png.
  • Call either gulp build-android-free --storepass mykeystorepassword or gulp build-android-paid --storepass mykeystorepassword
  • You can also call this script with a few parameters:
    • --packageid – Sets the package ID
    • --packagename – Sets the package name
    • --jarsigner – Path to jarsigner
    • --zipalign – Path to zipalign
    • --keystore – Path to your keystore file
    • --keystorealias – The alias of your keystore


I’m writing my first Cordova / Ionic Android and iOS app, and ran into an issue when submitting to the iOS app store. In order to submit your app, you need screenshots. And not the “minimum of 320px on the longest side” type of screenshot where you can submit almost anything, but the “must be exactly X and Y dimensions” type where you need (up to) 5 screenshots per device type.

This was a problem for me, because while I have a Mac, it’s slow as a wet week. It’s a 2009 unibody Mac that I bought off eBay. I went for the cheapest Mac I could find because I just needed it to deploy to my test device (an iPhone 4 I also bought off eBay) and fire off production builds when I was ready.

Because it’s so slow, running the simulator on it is nigh on impossible. It takes forever to start up and click on stuff, so I ruled that out. I then came across snapshot, part of the fastlane set of tools. This would let me create a new UI test, then edit the code to take snapshots when I needed to. It still relied on the simulator in the end, but it was automatic, so I could let it run overnight.

But I had to rule that out as well, because Cordova apps aren’t fully supported. I’d click on some elements in my app while recording a UI test, and they’d just get logged as generic ‘element.tap()’ events that did nothing when played back. Plus it required changes to the xcode project that would have just been overwritten when I next built the app, unless I wrote a hook to make this stuff for me. With no (easy) way around all that, I turned to “faking” the screenshots using a browser.

Google Chrome (and in fact, almost every other browser out there) has a set of developer tools that can emulate various screen sizes. The iPhone 4 emulation is nearly pixel perfect compared to an actual iPhone 4, so I decided to go for that. I fired up Ionic’s “ionic serve” command (or Cordova’s equivalent) and went to town.

The app in two sizes

iPhone 4 on the left, custom size on the right. Whoops!

The problem is, the size required for the 3.5″ screens is 640×920 and Chrome’s iPhone 4 preset gave me screenshots that were half that size. So I added a manual preset that was 640×920. But then my previews were off, because media queries kicked in and it was showing my app differently to how it really was.

Zooming did nothing in Chrome, and overriding the media queries was going to be a not-worth-the-hassle type of difficult. So I turned to Firefox.

Firefox gave me some success, because I could set a custom size, then zoom the window in 200% so in theory, I’d have a window size of 640×920, but the content doubled in size to negate the media queries. But when I clicked the screenshot button, I got a screenshot that didn’t honor the zoom settings in the way I expected, so I was left with a screenshot that was 320×460.

After literally hitting my head against the desk and trying six different screenshot tools, and thinking I’d have to resort to using Windows’ screenshot button and stitching the results in Photoshop, I finally nailed it.

Hidden screenshot buttonThere’s a second screenshot button in Firefox’s dev tools. You have to turn it on under the settings menu, but it gives you a screenshot of the viewport as it actually appears. I finally had a way to get screeshots at the correct resolution AND the correct view!

Now I was left with one last minor issue: How do I quickly sort out the screenshots?

So I did what I do best – Write a script to automate that shit!


Just run that in node.js (in the same folder as your downloads) and start taking screenshots. Anything it finds, it’ll compare the image dimensions and shove everything into the right folders.

A few minutes later, I had all the screenshots I needed and I was able to submit my app for approval by the end of the night. Ahh progress!

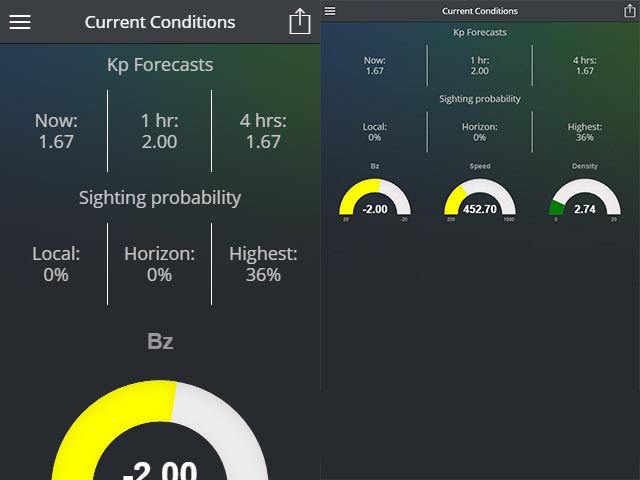
As you might have seen from my last post, I’m writing an aurora hunting app using Cordova and Ionic

, and it’s taught me a fair bit about other platforms and what it takes to write an app. I’ll update this post every now and again, but here’s a few things I’ve learned during the last 6 months writing my first app:

I’m using Ionic to write the app. As I learned AngularJS last year as part of another project, I’m very comfortable writing controllers, filters, services and so forth. I’m also loving Ionic’s “all in one” methodology, as you can do push notifications, sharing beta versions via email, and all that other good stuff.

Regarding Apple

I’ve got mixed feelings towards Apple. They make great hardware (if not underpowered compared to other laptops & desktops), and OS X is nice to use, owing to it’s Unix history (so a lot of tools I use in Linux are available), but the hardware is expensive and the extent to which everything is locked down, is frustrating.

To test an Android app on a real device, you just plug it in via micro-USB and run ionic run android after downloading the free SDK. A minute or two later and you’ve got your app running. If you don’t have an Android device, you can slip down to almost any store (here in Australia, they sell phones at the post office, the supermarket and other “nearby” places) and buy yourself a cheap Android phone, or you can fire up an emulator and use that. It’s really painlessly simple

To test on an Apple device, you need to buy an iDevice AND a Mac AND subscribe to Apple’s Developer Program. I bought everything second hand off eBay, so I was out $120 for an iPhone 4s, $175 for a 2009 (slow as hell) Macbook (and $30 for a charger, as it didn’t come with one) and $145 (a year) for a Apple Developer subscription. All that so I could test my app on a real device. Sure I could have done it on a simulator, but I’d still need a Mac and a developer subscription. For a developer with close to zero budget, it was a tough sell.

Once you’re ready to test, you need to run ionic build ios and then in Xcode, pick your device and run. It’s a more in-depth process than Android’s single command on literally any computer you have handy.

Complaints aside, I love how easy Safari’s remote web inspector works. Turn on developer mode in Safari, go into the settings for Mobile Safari and turn on the web inspector, then in the Developer menu in Safari, you can remotely inspect your app and check the console for errors, which came in extremely useful, as you’ll soon see.

Plugins vs. Native

My app worked great on Android and web, but failed on iOS. When it boots, it’s supposed to get your current location, then pass that to my API (for weather and aurora visibility) which returns data to Angular for use in the app. I had error callbacks throughout the process, but none of them were firing, so I assumed it was some security feature of Apple (namely App Transport Security, which was odd, because my API was using https).

After putting dozens of console.log() calls everywhere, I realised that my code was silently failing when obtaining the user’s location. This was due to me using the browser’s geolocation features, instead of relying on a Cordova plugin. Once I had that figured out, everything worked.

I also ran into this issue when I moved development from my Windows PC to my Macbook. Simply running npm install doesn’t install the plugins — you have to run one of Ionic’s state commands (e.g. ionic state restore).

In addition, running commands such as ionic plugin add com.example.plugin doesn’t persist that plugin, so be sure to add the --save parameter to the end.

Push Notifications

This is an area where you really have to get things right. Users can tolerate some bugs here and there, but when they receive more or less push notifications than they were expecting, that’s an instant uninstall, especially when it’s for stuff like aurora notifications, where timely notifications are crucial.

My first stumbling block with push notifications, was getting them to actually run. Turns out that I had the wrong API key from Google Cloud. You need a SERVER key, not an ANDROID key! Big difference! As soon as I had that set up and fed into Ionic’s dashboard, push notifications worked in a heartbeat. I also needed to generate a development push notification certificate, install it onto my Mac, then rebuild my app with that certificate, just so push notifications would come through. Yikes!

Eventually I’ll migrate push notifications over to GCM and APN, because Ionic’s free plan gives you 50,000 push notifications, then it’s nearly $700 AUD a year for 1.5 million pushes, and with zero budget, POSTing out the info for free seems much better, and a job perfectly suited for my API.

The next hardest part was actually triggering the notifications automatically. “All three” providers (Ionic Push, GCM and APN) make it easy enough to send out notifications (Apple require you use your own certificate in place of an API key which curl can handle), but I needed a way to automatically send out push notifications when an event is likely to happen.

This is still a work in progress, but essentially uses (will eventually be able to) set a minimum Kp alert. Every two minutes, the Kp in an hour is checked. If it’s above the minimum, they get an alert. If the Kp increases by an amount within the user’s specified timeframe (10 minutes during testing), they get another alert. Otherwise, nothing happens until the Kp dips below their minimum. This stops a ton of notifications coming through every 2 minutes and hopefully makes for a better experience.

I plan to expand the notification system to use other metrics, such as the “three” (Speed, Density, Bz) or NOAA’s text-based prediction, or possibly a hybrid auto / manual system, but for now, push notifications are the last major hurdle before release.

Dose of Double Darkplace Dex Medicine

Eventually, I hit a rather major stumbling block that put me out of action for a week – I was reaching the “64k method” limit. Whenever I’d try and build my app, it’d fail, spouting something about a dex method overflow or something. The “native app answer” was to enable multidexing, which I could do by putting a “build-extras.gradle” file in my platform directory and enabling multidex that way.

This felt rather.. unclean, as I’d have to do it every time I had to remove and add the Android platform, and I just want commands like ionic state restore to just work and get everything ready for buildin’.

That’s when I found this lovely little plugin that does all of that for me, and has the benefit of being a plugin so whenever I state restore, everything is automatically done.

Now my apps build again, and there’s only been a 2mb file size increase, which I’m sure I can bring down by tweaking some resources and such.

Name the app

Another big stuff-up I came across, was the naming of my app. When you create a new app in the Google store, the package name is set indefinitely as soon as you hit “publish”. I didn’t realise this until I created and uploaded the first (alpha) version of my app with the package ID com.ionicframework.appauroraslive562273. I went in and changed it in my config.xml, but Google rejected the file because the package name was different. I tried to delete the app, but after you hit Publish, even if it’s just a closed alpha test and nobody has been invited in yet, you can’t delete the app. You can unpublish, but not delete.

So now I have an app in the list called [REMOVED]. It’s an eyesore, but the best outcome I could get, so rename your app BEFORE uploading it to the store, even if you’re just alpha testing!

Handling multiple versions

I plan to offer two versions of my app – A free, ad supported version, and a paid, no ads version. Code-wise, the two are identical. I’ve used a Cordova plugin to detect the package name, and if it matches the free version, display ads. I manage the two code bases by having three branches in GitHub: “master”, “free” and “paid”.

Master is where the majority of the work is done. I build and test using this version. When I’m happy that everything is running smoothly, I create pull requests and merge those changes into “free” and “paid”.

I’ve got my config.xml set up in such a way, that I can easily bump versions and add new plugins without changing the package name, so when I run a build on the two branches, the package and app names remain untouched.

I can confirm that everything is good, by comparing the “master”, “free” and “paid” branches. If the only thing that is different is the package name and app name, then my code is 1:1 and ready to go.

Final Thoughts

Ionic makes it SO easy to get into app development. They offer a great AngularJS based framework that has a native app feel, Angular bindings for common Cordova plugins and a nice extension of the Cordova CLI.

But their platform is where it really shines. They have step-by-step tutorials on how to sign up and prepare your Apple account (which isn’t immediately obvious to someone who doesn’t develop apps for a living, or has never worked with Apple software in the past), then a spot in their dashboard where you upload your generated certificates, API keys and such, then sections for analytics, push notifications, user tracking and such.

They’ve really done a great job making app development and deployment easy. Shame about the high cost, but I suppose if you need to send out more than 50,000 pushes a month or have more than 5,000 users, your app is no longer considered a hobby?